Overview
An Alias Sender ID is used in messaging systems, particularly in SMS and business communication platforms, to represent the sender in a recognisable and brand-oriented manner. Instead of displaying a standard phone number, the sender's identity appears as a customised name or identifier.
How an Alias Sender ID works:
Brand Representation: Instead of displaying a phone number as the sender, businesses can use a name, company name, or a recognisable keyword. For example, a bank might use "ABC Bank" as the Sender ID instead of a generic number. This allows customers to instantly recognize who the message is coming from.
Customisation and Flexibility: Organisations can create different Alias Sender IDs for various departments or purposes. For instance, "ABC Sales" for promotional offers and "ABC Support" for customer service messages. This makes communication more targeted and relevant.
Sender ID Regulations: Depending on the country and its regulations, there might be specific rules for using Alias Sender IDs. Some regions allow alphanumeric Sender IDs (like "MyStore" or "Promo123"), while others may require registration and verification for using custom Sender IDs.
Create an Alias SenderID
Enterprise Admin
Permissions Required
Admin/Super Admin
To add an alias sender ID,
Login to the Wisely platform with valid credentials.
Navigate to Channels --> General --> Alias SenderID from the left menu.
Click the Alias SenderID at the top right corner.
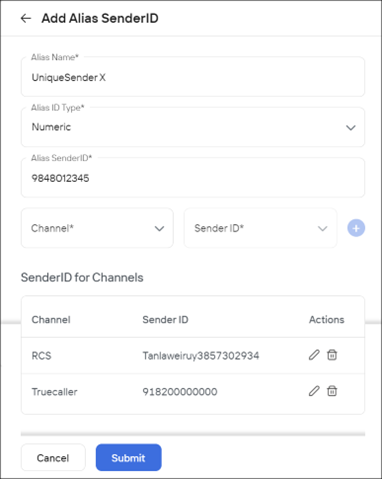
Complete the following details.
Field | Description |
|---|---|
Alias Name | Alternate name to an actual one. For example, UniqueSender X |
Alias ID Type | The ID type that you want to choose. This includes numeric, alphanumeric, and Email. |
Alias Sender ID | The alternate ID that you want to choose for the actual one. For example, 9848012345 |
Channel | The channel type which you want to choose from. This includes SMS, RCS, Truecaller, and WhatsApp. |
Sender ID | The actual sender ID for which you want to map with alias. |
Click Submit.
Aggregator Admin
Permissions Required
Admin/Super Admin
To add an alias sender ID,
Login to the Aggregator platform with valid credentials.
Navigate to Channels --> General --> Alias SenderID from the left menu.
Click the Alias SenderID at the top right corner.
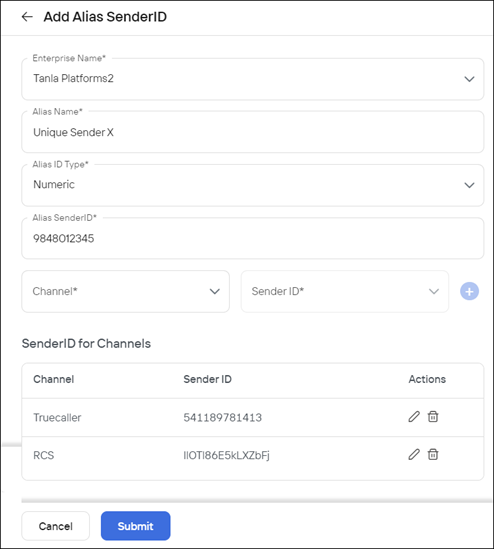
Complete the following details.
Field | Description |
|---|---|
Enterprise Name | Name of an enterprise in which you want to alias a sender ID. For example, Tanla Platforms. |
Alias Name | Alternate name to an actual one. For example, UniqueSender X. |
Alias ID Type | The ID type that you want to choose. This includes numeric, alphanumeric, and Email. |
Alias Sender ID | The alternate ID that you want to choose for the actual one. For example, 9848012345. |
Channel | The channel type which you want to choose from. This includes SMS, RCS, Truecaller, and WhatsApp. |
Sender ID | The actual sender ID for which you want to map with alias. |
Click Submit.
Edit an Alias Sender ID
Enterprise Admin
To edit an alias sender ID,
Navigate to Channels --> General --> Alias SenderID from the left menu.
The listing page opens.Click the stencil icon (
.png) ) next to the alias sender ID.
) next to the alias sender ID.
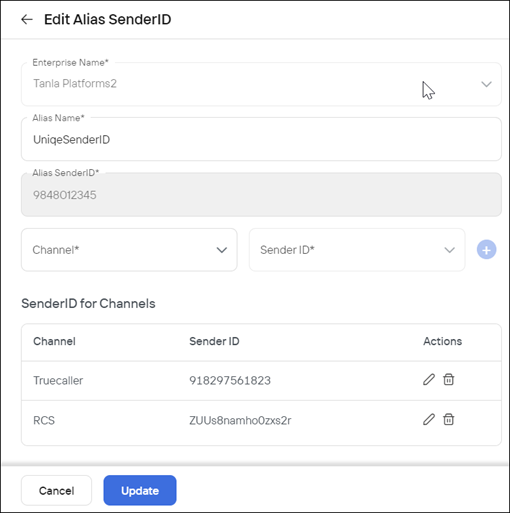
The edit form opens.Change your required details and click Update.
Your changes are saved.
Aggregator Admin
To edit an alias sender ID,
Navigate to Channels --> General --> Alias SenderID from the left menu.
The listing page opens.Click the stencil icon (
) next to the alias sender ID.
The edit form opens.Change your required details and click Update.
Your changes are saved.
Deactivate an Alias Sender ID
Enterprise Admin
To deactivate the alias sender ID,
Navigate to Channels --> General --> Alias SenderID from the left menu.
Click the Alias SenderID at the top right corner.
The listing page opens.Toggle off the button next to the alias sender ID that you would like to deactivate.
A popup appears saying “Are you sure you want to deactivate?”Click Yes to proceed.
Your alias sender ID will be deactivated.

Aggregator Admin
To deactivate the alias sender ID,
Navigate to Channels --> General --> Alias SenderID from the left menu.
The listing page opens.Toggle off the button next to the alias sender ID that you would like to deactivate.
A popup appears saying “Are you sure you want to deactivate?”Click Yes to proceed.
Your alias sender ID will be deactivated.