Wisely empowers you to setup the Truecaller channel in multiple ways to send your business messages using our Wisely APIs. These are
Activate or Setup Truecaller
The activation of Truecaller with the Wisely platform represents a significant advancement in enhancing customer communication and engagement. Wisely, a communication channel known for its data-driven insights and customer relationship management capabilities, leverages Truecaller's robust caller identification and verification services to offer a more comprehensive and secure communication solution.
By linking your Truecaller account or number to Wisely, you gain the ability to manage customer interactions, and track communication metrics all in one place.
Once you activate the Truecaller account with Wisely, you can use our APIs to send or receive messages to a large volume of your customers in one-go.
Pre-requisites
Phone Number: This should be mobile number with country code, a toll-free number, or landline number.
Business Name & Logo: These should be approved or certified by local government.
Enterprise Admin
Permissions Required:
Super Admin/Admin
To activate the Truecaller services,
Login to Wisely account with valid username and password.
Navigate to Channels --> Truecaller.
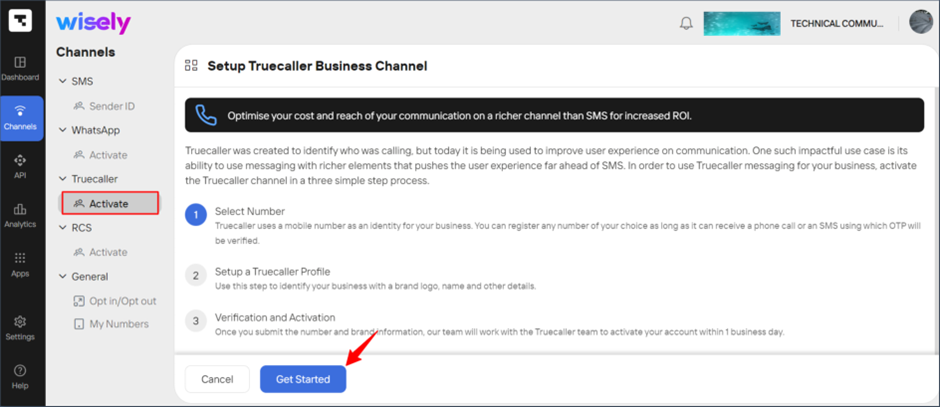
Click Activate.
The Setup Truecaller Business Channel opens.Click Get Started.
In Mobile Number field, select a number form the drop-down menu. (Or) If no number existing in the platform, click Add Numbers. Refer here to Add Numbers to the Wisely platform.
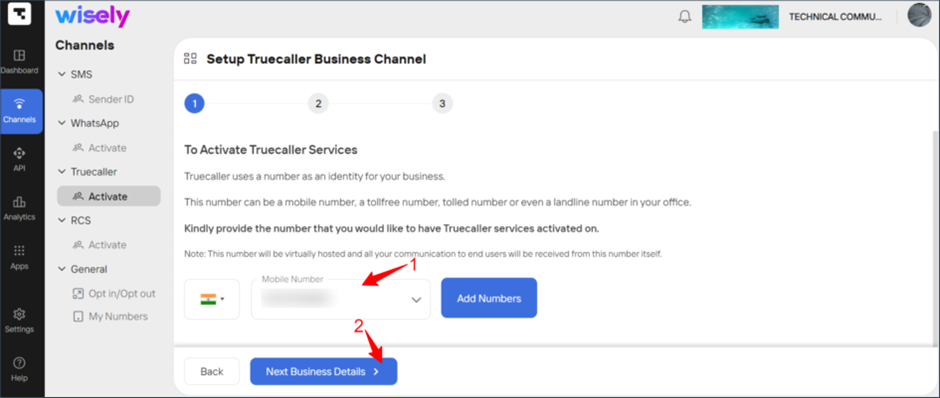
Click Next: Business Details.
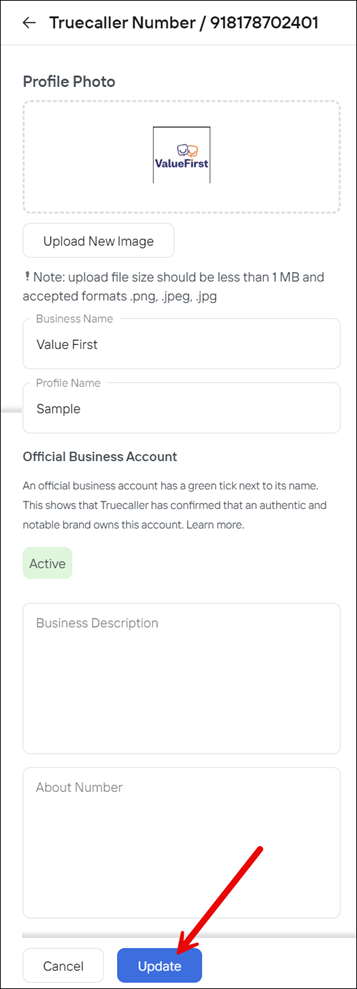
Enter the following business details:
Business Name
Profile Name
Brand Logo/Display Image
Contact Information including Name, Designation, Email, and Phone number.
Click Confirm.
Your Truecaller account activation status moved to Pending Activation. Once Wisely activated your Truecaller account, you are ready use our APIs.

Aggregator Admin
Permissions Required:
Super Admin/Admin
To activate the Truecaller services,
1. Login to Aggregator account with valid username and password.
2. Navigate to Channels —> Truecaller.
3. Click Add Numbers. The Add Numbers Wizard opens.
4. In the Enterprise Name field, select a name from the drop-down menu and click Next. The Setup Truecaller Business Channel page opens.
.png "image(370).png")
5. Click Get Started.
.png "image(371).png")
6. In Mobile Number field, select a number form the drop-down menu. (Or) If no number existing in the platform, click Add Numbers. Refer here to Add Numbers.
.png "image(372).png")
7. Click Next: Business Details.
8. Enter the following business details:
a. Business Name
b. Profile Name
c. Brand Logo/Display Image
d. Contact Information including Name, Designation, Email, and Phone number.
9. Click Confirm. Your Truecaller account activation status moved to Pending Activation. Once Aggregator activated your Truecaller account, you are ready use our APIs.
.png "image(373).png")
.png "image(374).png")
Edit Business Profiles
You can edit the details of your Truecaller business profiles, if you would prefer to change.
Enterprise
To edit your Truecaller business profile,
Navigate to Channels --> Truecaller from the left-menu.
Click the Business Profiles.
The profiles page opens.Click the stencil icon (
.png) ) far right to your truecaller number.
) far right to your truecaller number.Modify your required details and click Update.
Aggregator
To edit your Truecaller business profile,
Navigate to Channels --> Truecaller from the left-menu.
Click the Business Profiles.
The profiles page opens.Click the stencil icon (
) far right to your truecaller number.Modify your required details and click Update.
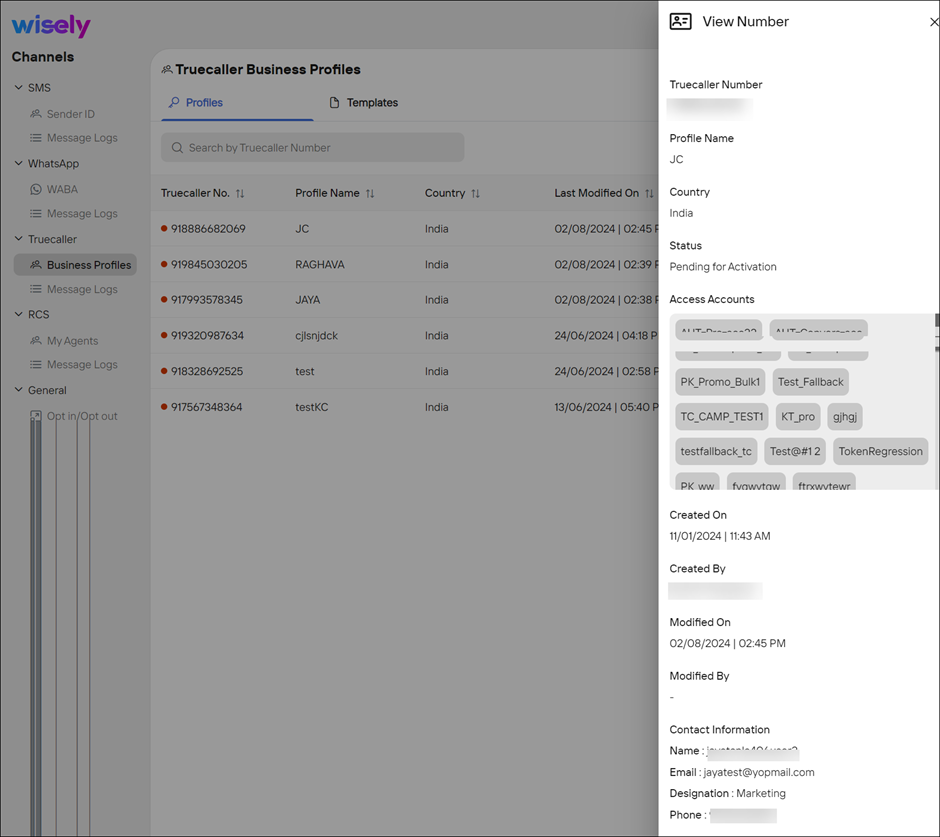
View Truecaller Business Profiles
You can view the complete details of your business profile which include the status, type of access accounts linked, contact information of a user who created the business profile.
Enterprise
To view the business profile,
Navigate to Channels --> Truecaller from the left-menu.
Click the Business Profiles.
The profiles page opens.Click the eye icon (
.png) ) far right to your truecaller number.
) far right to your truecaller number.
Your profile details open in the right-side menu.
Aggregator
To view the business profile,
Navigate to Channels --> Truecaller from the left-menu.
Click the Business Profiles.
The profiles page opens.Click the eye icon (
) far right to your truecaller number.
Your profile details open in the right-side menu.
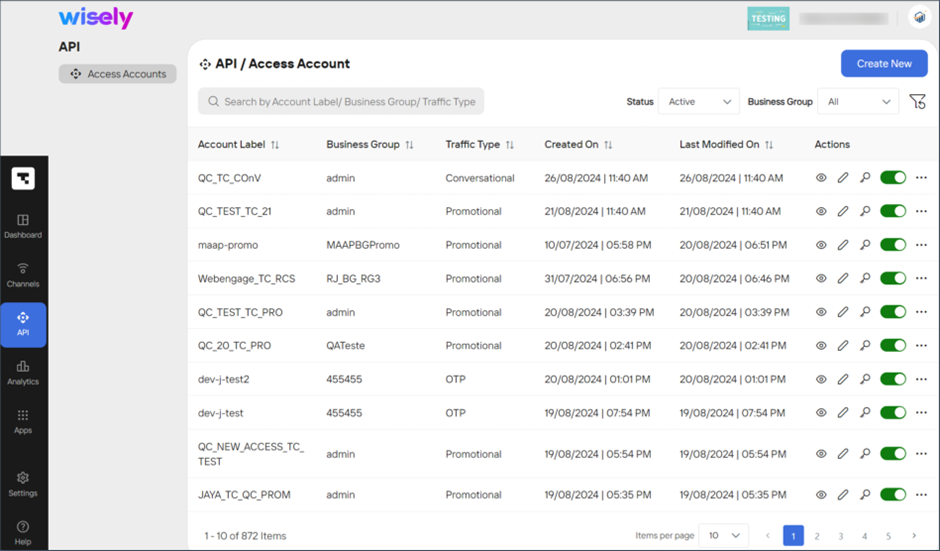
Navigate to Access Accounts
Wisely enables you to easy navigation to view the access accounts which are linked to each truecaller number.
Enterprise
To navigate to access accounts,
Navigate to Channels --> Truecaller from the left-menu.
Click the Business Profiles.
The profiles page opens.Click the focus icon far right to the truecaller number.
You will be redirected to the access accounts page.
Aggregator
To navigate to access accounts,
Navigate to Channels --> Truecaller from the left-menu.
Click the Business Profiles.
The profiles page opens.Click the focus icon far right to the truecaller number.
You will be redirected to the access accounts page.
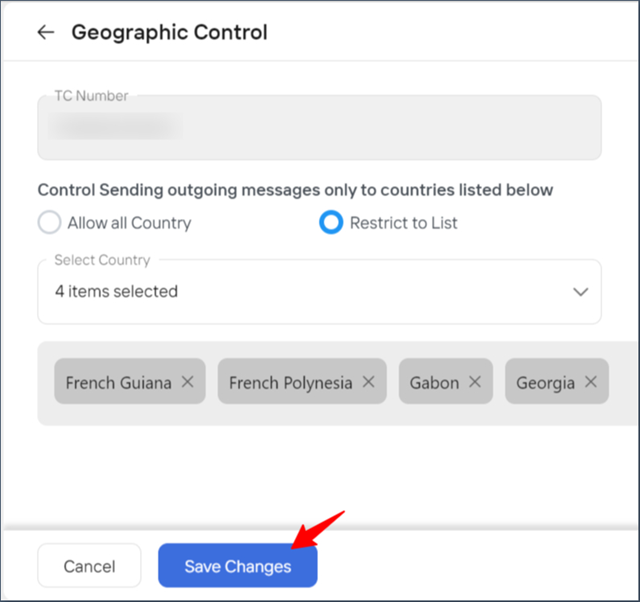
Setup Geographic Control
Wisely supports Geographic Control feature which allows you to send your outgoing messages to designated countries only. The geographic control feature is applicable to the Truecaller business profiles which are in “Pending Activation” state.
Enterprise
To setup geographic control,
Navigate to Channels --> Truecaller from the left-menu.
Click the Business Profiles.
The profiles page opens.Click the ellipses icon (...) far right to the truecaller number.
Select Geographic Control from the drop-down menu.
The Geographic Control page opens.Select the radio button left to the following options:
Allow All Countries: allows you to send messages to any country.
Restrict to List: allows you to send messages to the selected country or countries.
Click Save Changes.
Aggregator
To setup geographic control,
Navigate to Channels --> Truecaller from the left-menu.
Click the Business Profiles.
The profiles page opens.Click the ellipses icon (...) far right to the truecaller number.
Select Geographic Control from the drop-down menu.
The Geographic Control page opens.Select the radio button left to the following options:
Allow All Countries: allows you to send messages to any country.
Restrict to List: allows you to send messages to the selected country or countries.
Click Save Changes.